Comfort inside when there is snow outside.

I can't remember when I first tried Chai Tea but I have loved the spicy, warm, soothing drink ever since.  What I do know is that they can be pricey at a coffee shop of cafe so I decided to try to make my own a few years ago.  So, I did a internet search for Chai Tea recipes.  There were a lot but many of the recipes seemed to be rather complicated.  I don't have time to break up cinnamon sticks and crush nutmeg pods though I'm sure that the results would be wonderful.  I finally found a simple recipe using ground spices on CDKitchen.  I looked at when I printed the original recipe and I couldn't believe it but it was back in 2006.  So needless to say I have been making this for a "few" years.  The original recipe was not available when I did a search of the website today.  Don't worry, I'm going to give it to you.

Chai tea originated in Siam and India some 5000 years ago.  It has since spread the world over. The wonderful spices that are used have healing properties according to alternative medicine.  I just know that I feel better after having a cup.

Traditional Chai has peppercorns in it but this recipe has a pinch of ground cayenne in it.  This recipe is for a concentrate that I then use to make a Chai Latte by adding milk to the concentrate.  This recipe begins with 6 cups of water and when completed and filtered the concentrate fills a quart jar which I store in my refrigerator.

Spicy ingredients
Spicy ingredients

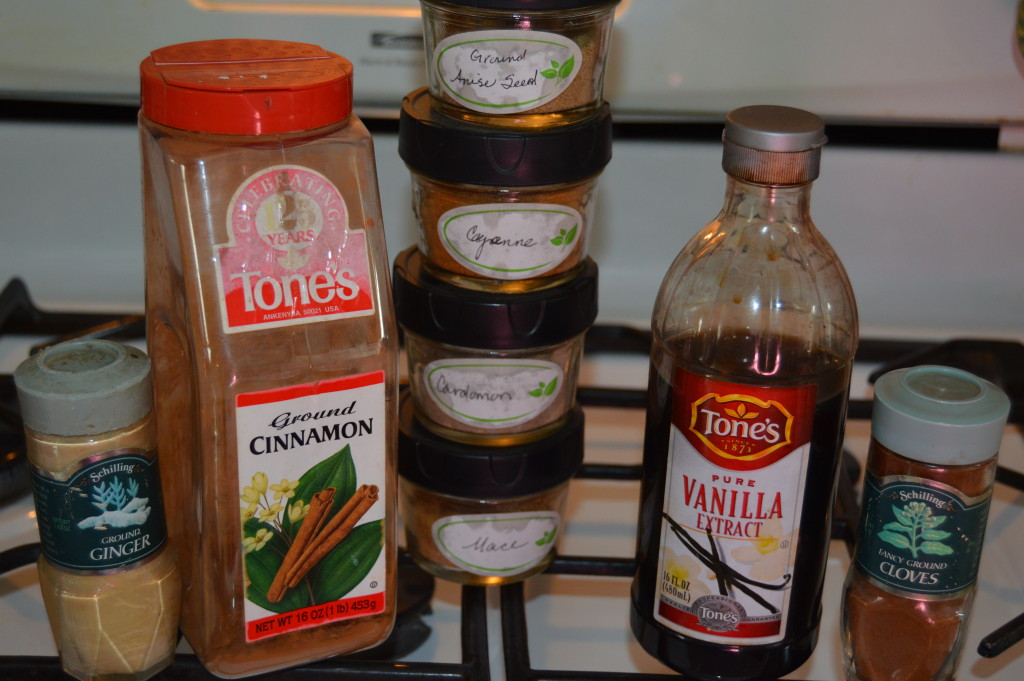
Start with gathering the spices that you will need and 4 black tea bags.  You can use bulk black tea if you prefer.  You can find the spices at your local natural food store in bulk.  They are usually much less expensive than buying them in the little jars like you see on the ends in the picture.  I have been refilling these for more than 20 years because they are the ones that are on my spice rack.

Ready for the hot tub

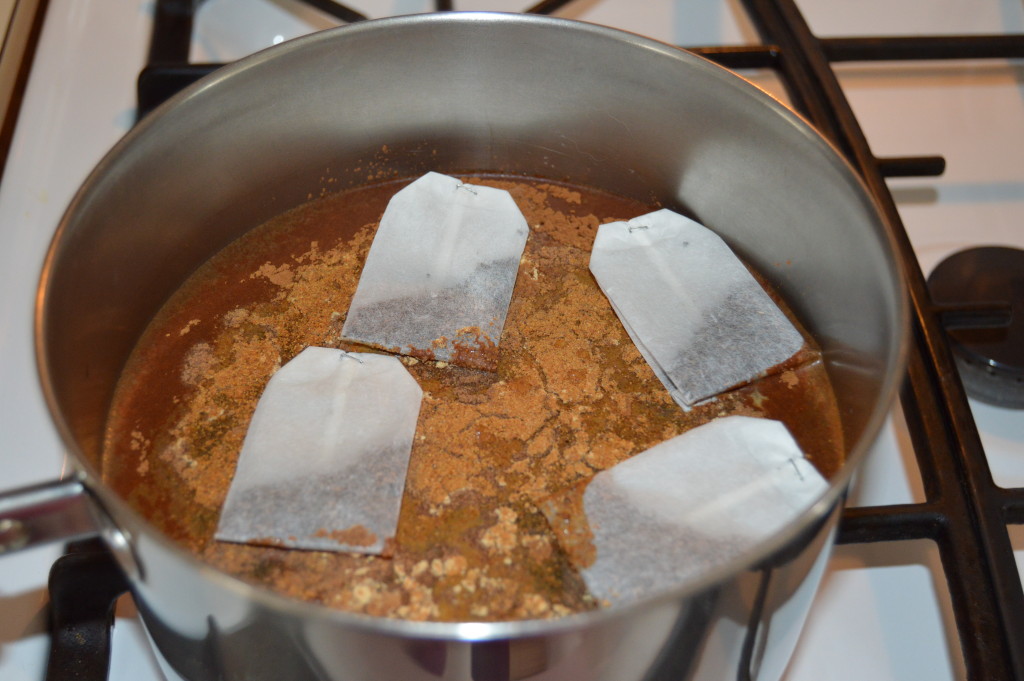
Once you have the spices together put the water in a sauce pan and measure the spices, honey, and sugar into the water.  Throw in the tea bags or bulk tea.  Give it a little stir and turn on the heat.

All happy
All happy

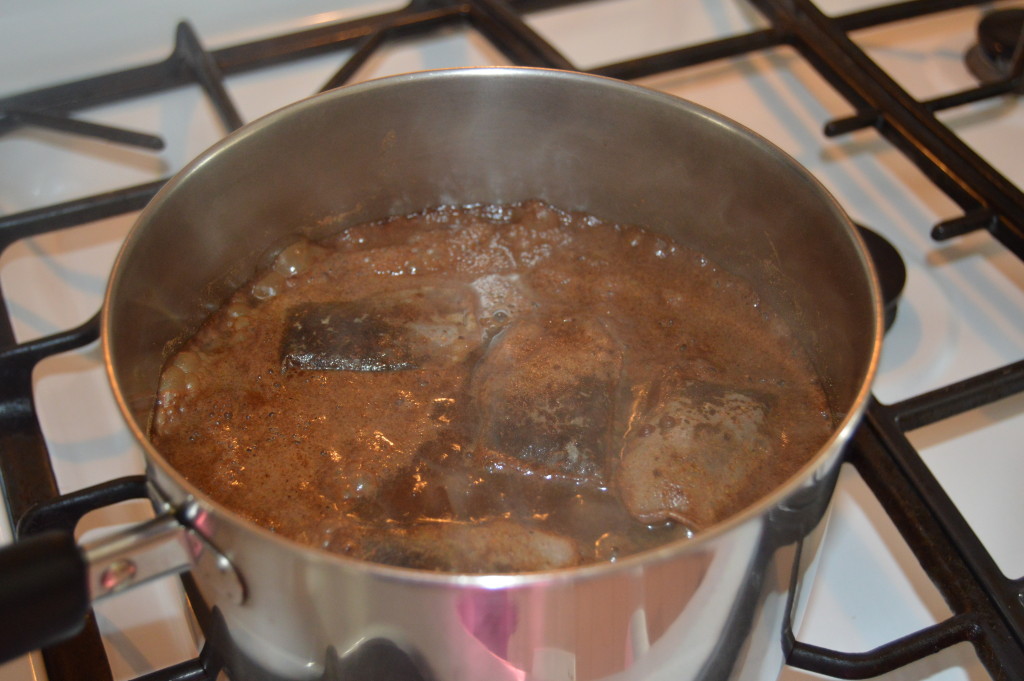
Bring all these ingredients to a boil then turn to low and simmer for 10 minutes.  Turn off the heat, add the vanilla and let everything cool.

The glop of spices
The glop of spices

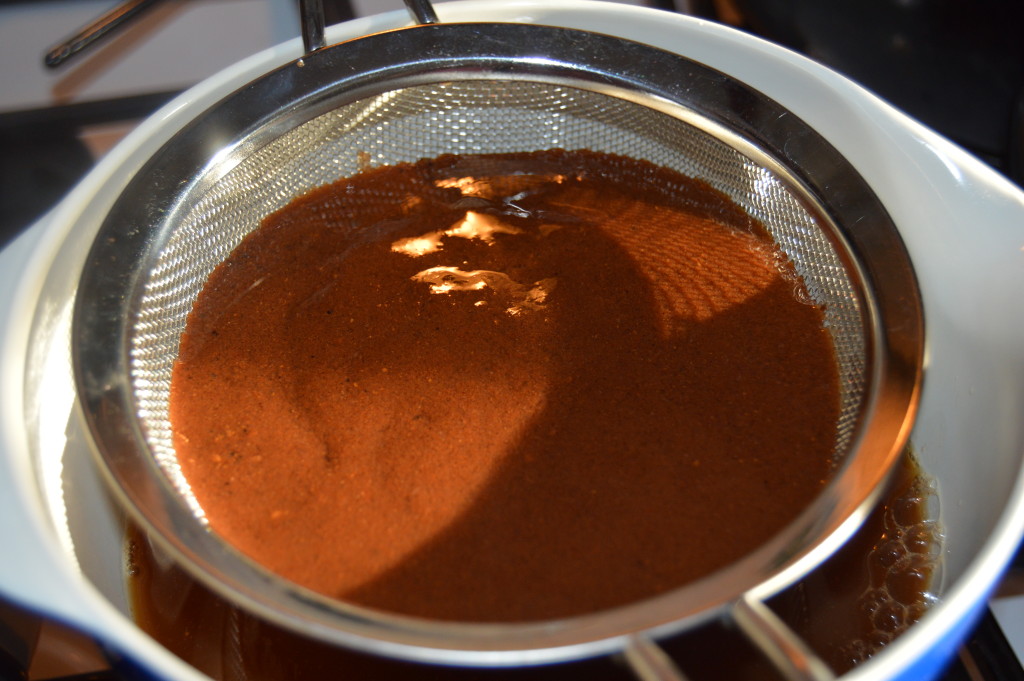
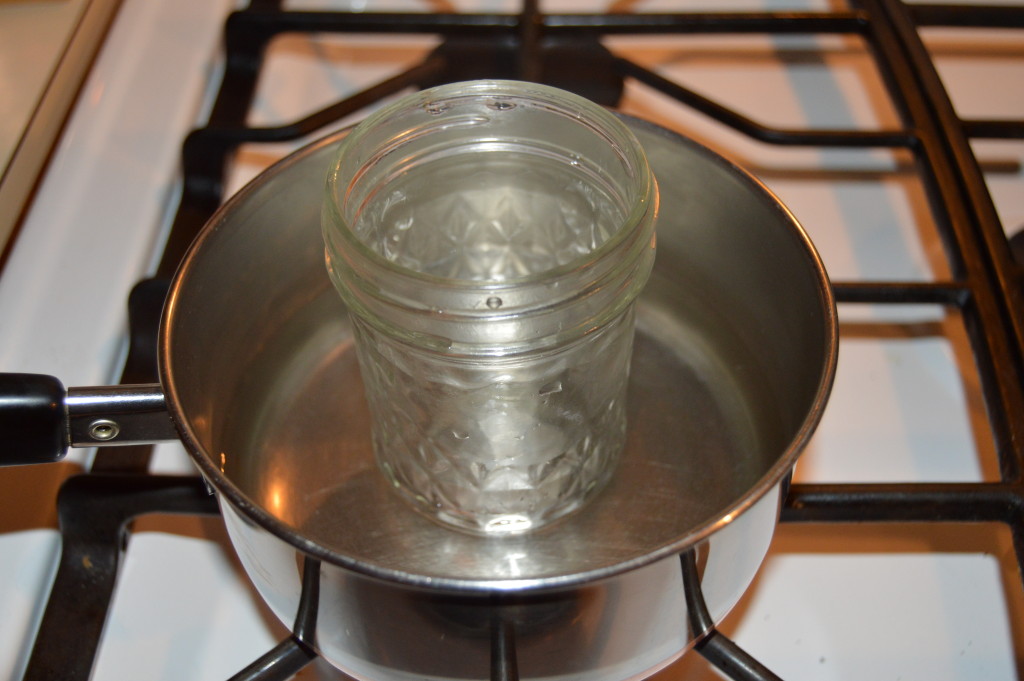
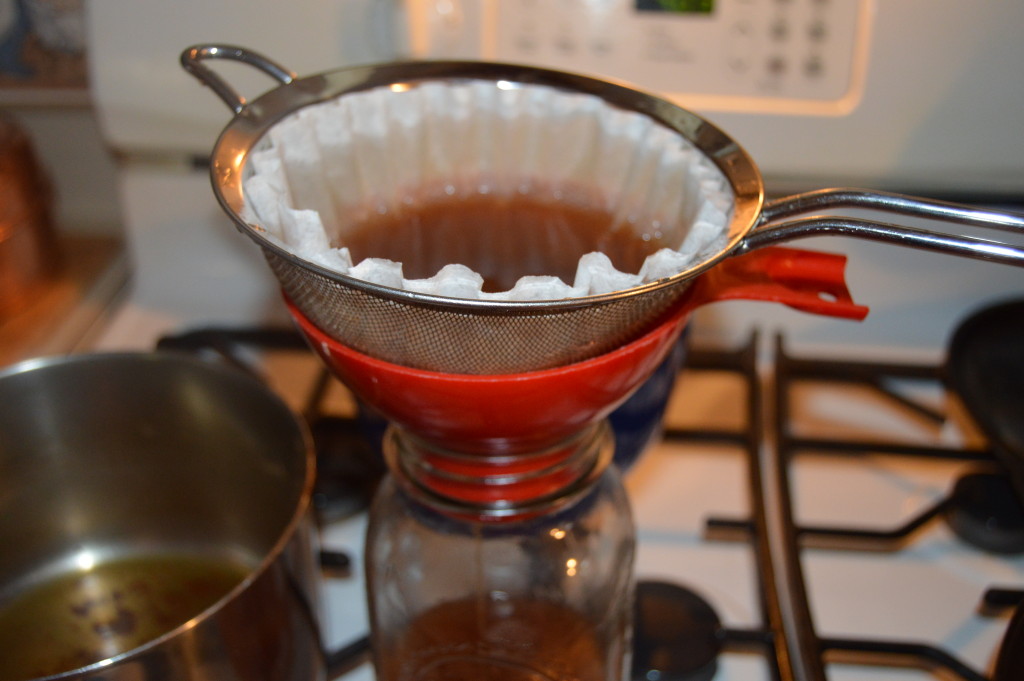
Once the sauce pan is cool strain the mixture.  I put it through a mesh strainer first into a bowl. You will find that the spices have turned into a sticky glob.  Most of it will come out with the strainer but I do a second strain through a paper coffee filter into the mason jar.  You could also use a piece of cotton or cheese cloth. This just gets out most of the stuff that would make your Chai a bit gritty.

Finally into the mason jar

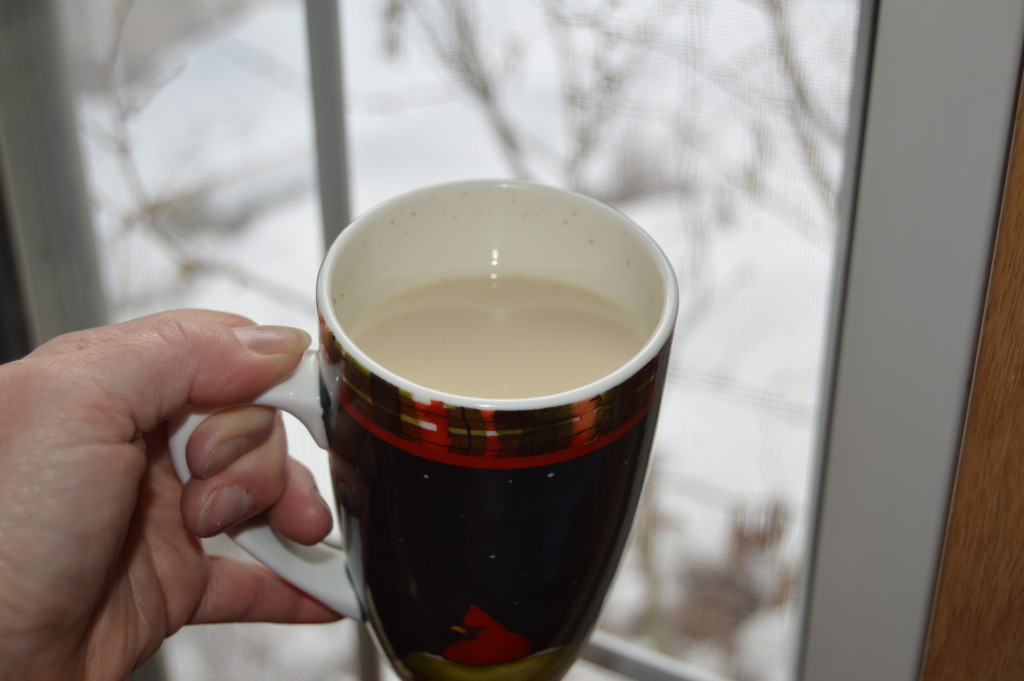
Store your concentrate in the refrigerator until you want to use it.  Usually I'm taking this to work so I use my insulated mug.  I fill the mug half way with tea concentrate then the other half with milk then put the whole thing in a small sauce pan.  I like to heat the mixture gently on the wood stove in a sauce pan but it can be microwaved if you just can't wait.

By the way, your house will smell fantastic while you are making this.  Have a nice hot Chai Tea Latte next time you want a hug in a mug.

Blessings,

Merrie


Mt. Katahdin
Mt. Katahdin

No matter what you call it you cannot live without it.

We have a well and therefore an electric well pump that gets the water from the well to the pressure tank, which is also electric.  When there is no electricity the biggest thing for us is that we have no water.  That, to me, is even worse than being a little cold.  Now if you know there is a storm coming you can get ready for the possibility of the electricity going out.  I do fill the bathtub that we have in the second bathroom.  They even make bathtub water storage containers. These are large bladders that will hold 65-100 gallons of water and fit right in the bathtub.  Some even come with a pump to easily move the water into smaller containers for use.  So far I haven't invested in one although they run around $20-$40.  I like the idea because it keeps the water clean and drinkable.  The water that I fill my tub with when we are expecting a storm is only used to flush the toilets with because no matter how clean your bathtub is I still don't want to drink that.

Berkey Water Filters

That brings me to water filters.  Some folks who are on municipal water systems have filters on their faucets or use something like a Brita to filter your water on a daily basis.  Fortunately we don't need to do that with our well water.  I have had it tested several times and it is more than safe to drink right from the tap.  My son lives in the Dallas, TX area and is on municipal water. He has a Brita type pitcher in his refrigerator that he keeps his drinking water in.  These are fine for filtering out things like chlorine and other bad tastes but they really won't take out the things that make you sick like bacteria, viruses and heavy metals.  For that you would need a filter system with more than just charcoal filters.  Although we have not invested in one of these yet either, I'm looking at a Berkey Water Filter.  It is a significant investment running between $200 and $300 depending on the size you get and if you buy additional filters.  I would recommend always having at least one set of back up filters on hand.  The Berkey uses two filters with room to expand to 4.  Water is filtered at a faster pace if you have 4 filters in your Berkey.

So, there is no storm but the power suddenly goes out.  It is always a good idea to keep a few bottles of drinking water stored for just such events.  I have a few gallon Poland Springs water jugs that I keep water in.  I try to change it out every six months or so.  These are not the milk jug type bottles but stronger plastic.  Milk jugs actually are not good to store water in.  They are made to eventually break down and will leak.  Not good if you have them stored in the bottom of your closet when this happens.  Soda bottles are actually good for water storage.  They are made to hold the pressure of carbonation so they are pretty strong.  If you drink soda wash the bottles out after use and fill with water.  If you don't drink soda, I bet you know someone who does, just ask if they will save some bottle for you.  Right now I don't have a good place to put filled soda bottles so I have just been saving them.  We drink very little soda so I save all that I get.  I'm working on some ideas and hope to have a spot to fill and store about 20 two liter bottles of water very soon.  It is helpful if you can store your bottles in a dark place such as the bottom of your closet.  Stored water can sometimes taste a little flat.  To rejuvenate it just take two glasses and pour the water between them a couple of times.  This puts a little air into it and helps with the taste.

We also have a pond and a couple of 3 season streams on our property but surface water is never safe to drink without filtering it.  There are many kinds of portable water filters made for camping and hiking and these are effective.  Each of my family members carry a LifeStraw with them at all times in case of emergencies.  You never know where you might be when there is a water emergency.

Although not hooked up yet we have the supplies, including the hand pump, to insert into the well if it looks like it would be a very long term power outage.  Barring any strange thing happening that would contaminate our well we know that the water is safe to drink.  You might want to consider getting something like this.  The pump we have was not very expensive and the pipe is just several lengths of PVC pipe and joints.  Don't forget the joint cleaner and sealant.  Eventually we will put this on the top of the well and build a small house around it so it will not be exposed to the weather.  We will replace the inexpensive hand pump with a Bison Hand Water Pump which are made right here in Maine and are very high quality stainless steel.

Take some time to review what you would do if you were unable to use your tap water.  It is okay to start small but please do something.

Blessings,

Merrie


The barn through the snow

I know some of you around the country have been experiencing winter already but here in the northeast we had a very mild December.  It was a little disappointing to not have any snow on the ground for Christmas but it has finally arrived.  In the last couple of weeks we have had probably a foot and a half between a couple of storms and it is snowing again today.  Part of why my husband and I live in Maine is we love the change of the seasons, even winter.  I admit that fall is my favorite but I do look forward to the first snow of winter.  There are some years, like last, that winter seems like it will never end but it always does.

So, are you ready for winter?  Around here there is always a chance that the power will go out during a storm, well actually, anytime.  In the summer it is not such a big deal because it is not cold but it is still an inconvenience.  However during the cold months keeping warm during a power outage can be a challenge.

We use wood as our primary heat source anyway so that is simple for us, just keep feeding the wood stove.  Some homes have fireplaces that can be used for heat in an emergency.  It is important that maintenance be done regularly on a fireplace. The chimney, flue and damper need to be clean and in good working order for use.  If that is not a option for you I encourage you to look into alternate sources that do not require electricity.  There are kerosene and propane heaters available but make sure that you follow the instructions to the letter.  It is important that there is sufficient ventilation when using an alternate heat source.  I would also recommend that you have a carbon monoxide detector in the space.

Our wood box
Our wood box

Any heat source is only as good as the fuel it uses.  No matter if you are using a wood stove, fireplace, kerosene heater or a candle heater without fuel they all are useless.   We have a wood shed that is filled each summer for the following winter but if you don't use wood regularly but have a wood burning back up obviously you need to have some wood stored.  Likewise for a propane or kerosene heater.   Propane will store pretty much indefinitely.  You can store the small camping size propane fuel all the way up to 100 pound tanks.  It depends on what you are trying to run with the propane.  We have propane plumbed to the house but that is not accessible to hook to something else.  I have a couple of 100# tanks and the hook up hardware that we could connect them to either a grill or a heating device if needed.  We also have several of the grill sized tanks that we keep filled and rotate on a regular basis through the grill mostly.

Kerosene needs to be stored in containers just like those that gasoline are stored in.  They make ones that are blue to indicate that they contain kerosene.  If you go to the section where gas cans can be found at the store there would be blue ones for kerosene and yellow ones that are meant for diesel.  As we have talked about before on fuel storage be sure to rotate your storage regularly so that it will not get old.  How much you store is up to you.  Our third source of heat for our home is a heater that runs on kerosene that came with the house so we have a fairly large tank with kerosene in it.  We also have back up lighting in the form of Aladdin kerosene lamps.

Now on to the candle heaters.  I am intrigued by the idea of using a few clay pots, some bolts, washers, nuts and candles to make a room heater.  The link above takes you to several pictures of different versions of this idea.  I have not yet made or tested one of these but it looks like fun.  My son actually has a fireplace in his apartment but no source for wood so putting one of these on the hearth might work well for him.  So if you are going to go with something like this you of course would have needed to put together one or two of these and have the candles needed to produce the heat.  I buy jar candles at AC Moore.  They have good sales if you keep an eye out.  I usually just get vanilla since other scents seem to be a little overwhelming.  These burn for a long time as opposed so some of these designs that call for tea lights that burn out in a few hours.  It is always a good idea to have some candles on hand anyway.  Not only do they provide light and a bit of heat when the power is out it adds a bit of romance and fun to the situation.  Just make sure that you have safe places to put them so that children and pets can't disturb them and get hurt or cause a fire.

Speaking of fire.  Everyone should have a fire extinguisher and smoke dectors in their home too.  Hopefully you will never need it but if you do, you do.  However with that said, never try to fight a fire alone.  It is much better to get your family and pets out of the house and call the professionals.

Happy fire in our wood stove

Have flashlights and know where they are.  Store them in a easy to reach place and check their batteries on a regular basis.

Keep extra sweaters, blankets and warm socks on hand too.  I helps to layer up.  If you have a way to heat water drinking warm beverages also helps you to keep warm.  I keep a full kettle on my wood stove all the time.  Get out the board games and sit by the fire and play games by the light of the kerosene lamp.  It can be rather fun.

Let's talk about water next time.

Blessings,

Merrie


1

Uncle Ken and Scott 20 plus years ago

We are so blessed to live here in the northwoods of Maine and doubly blessed because we have family really close.  Our Uncle lives next door and my inlaws live about 1/4 mile down the road.  There is nothing better than family.

Uncle Ken who lives next door celebrated his 88th birthday on Monday.  He is one of the most intelligent and gentle men that I know.  I have only had the privilege of knowing him for the last 30 years or so but my husband has spent his whole life learning from this man.  Uncle Ken is by education and career a Structural Engineer but he taught my husband so much more.  How to work on and repair vehicles (when you could still do that in the back yard or your own garage), taking and developing photographs (long before digital), construction and building and so many other things.  The most important being to love the Lord.

For me he has been a great help in all the building projects around the homestead. Anytime that I get an idea in my head I always run it by him to see if what I have conceptualized it doable and won't fall down the way I plan on doing it.  I have also had a fine example of a Christian man to watch every day.  For our son he has also been a great influence and he has been collaborating with Uncle Ken on a book of sorts on politics and war.  Uncle Ken having been born in 1928 has seen a lot of this world's history first hand and our son it very interested in history.

Just a few days after his 88th birthday Uncle Ken had a stroke.  He is recovering very well but the event seems to bring a lot of things into focus.  The biggest being how empty all our lives would be without him.  Although he is more than ready to go home to glory to be with his Lord and Savior those of us who would be left behind  would still hurt.  The Lord chose not to take Uncle Ken home at this time so it is our duty, my duty, to continue to glean from this wonderful man.  And to realize each and every day how much we are blessed by him.  And for him to know this from us.

My wish is that you also have a Uncle Ken, or several, in your life.  Let them know how much they mean to you and cherish what you have learned from them.  So many of the old ways are being forgotten, preserve what you have learned and pass it on to the next generation.

Blessings,

Merrie

Frosty morning
Frosty morning

My hubby was working a 10 hour shift so I spent my New Years Day working on various projects.  We had around a foot of snow between Tuesday and Wednesday and even though Ken had spent two evenings plowing to make things passable there was still clean up to do which is much easier in the day light.  After doing a couple of hours on the tractor with the plow and taking care of the chickens it was time to refill my supply of lip balm and try a new lotion recipe.

I have been making this lip balm for about a year now.  I tweeked it once because the original recipe was a little stiff and I wanted it creamier.  This time I tried one other new thing.  I made a couple tubes with tinting.  Everything that I have read said to just put some old lipstick pieces into the mixture and melt it to get tinting but I didn't want to do that.  Much of what is contained in commercial cosmetics is so bad for you.  So I finally read somewhere a suggestion to use Organic Beet Root Powder.  it is a beautiful shade of pink.  I only used a small amount because I wasn't sure how dark it would be.  I filled 4 tubes first with the plain mixture then added about a 1/8 teaspoon of the beet powder.  The final product turned out a bit light so next time I'll try a little more.

The ingredients
The ingredients

Here are the ingredients, see the pretty color of the beet root powder.  The stuff wrapped in plastic in the center is shea butter.  It has a wonderful smell.  The canning jar is filled with bees wax pellets.  We haven't produced enough of our own bees wax yet to use but hopefully in the future.

Double boiler
Double boiler

This is how I melt my ingredients.  The 1/2 pint jelly jar with the straight sides make it easy to clean when you are finished.

Peppermint Lavender Lip Balm

  • Yield: 6-8 Tubes

Ingredients

  • 4 tsp. beeswax pellets
  • 2 tsp. shea butter
  • 3 tsp. almond oil
  • 1 tsp. coconut oil
  • 5 -8 drops peppermint essential oil
  • 3 -4 drops lavender essential oil
  • 8 lip balm tubes

Instructions

  1. Add 2 inches of water to a saucepan or slow cooker. Put saucepan on medium high heat. If using a slow cooker use hot water to start and turn to high
  2. In a glass jar put bees wax, shea butter, almond oil and coconut oil. Put the glass jar in the water in either the saucepan or slow cooker. Stir occasionally as everything melts.
  3. Once everything is melted turn off the burner. Add the essential oils and stir. I use a ration of 2:1 peppermint to lavender.
  4. Now the tricky part, filling the lip balm tubes. I have found that a straw works well. I use clear ones so I can see the level of the liquid. I actually suck up the hot liquid. I can't stress enough to not go beyond about half the length of the straw. Hold the upper end closed then release the liquid into the tube. It may take two or three times to fill each tube. Round out the top of the tube by a drop or two but don't overflow. When the mixture cools it shrinks to level with the top of the tube. Make sure the jar stays in the hot water while you work so the mixture doesn't start to solidify.
  5. Once all the tubes are full let them sit for an hour or so to cool. Do not cap until completely cool.
  6. Feel free to try other essential oils. Wild orange makes a fun creamsicle lip balm.

This recipe it easy to make and once you have the ingredients only takes a few minutes to have a healthy product without any artificial ingredients.  The other great thing is that the ingredients have natural SPF so this lip balm has sunscreen powers too.  You can find these ingredients at your local health food store or online.  I always try to use organic.

Cooled lip balm and lotion

This is the first time making the lotion so I'll let you know how I like it.  If it turns out to be great I'll share that recipe with you in the future.