Ready for Snow
Ready for Snow

Don't get me wrong, we love our metal roof.  Ever since we put it on the house 10 years ago there have been no worries about snow overload or ice dams.  The only drawback has been the front porch.  Every time the avalanche of snow comes off the roof we know that getting it off the porch is the next task.  When the snow slides off and then drops 8 feet to the porch it lands with such force that we end up with a solid snow pack right in front of the door.  It can be a real challenge to get it shoveled off sometimes depending on how much has come off of the roof occasionally requiring the ice scrapper.

Since November has blessed us with some nice warm days I decided at the last minute that it would be really nice to have a roof over the porch so that we didn't have to mess with the snow pack this winter.  I sat down one Friday evening and wrote up my supply list and Saturday headed up to the lumber yard.  My hubby was at work so I got started on my own.  Let me just say that 4 x 4 pressure treated posts are not light especially with a bit of a wind.

Post in place and braced

Once the posts were in place and braced, which was fun to get plumb and braced by myself, I put the brackets on top of each post to hold the headers.  I built the headers to extend past the front post about 6 inches in order to keep the snow and rain off the edge of the porch.  These were heavy when I got finished sandwiching plywood between 2 x 6 lumber.  When my Sweetie got home from work we had just enough daylight to get the headers screwed in place.

The next step was to cut and install the rafters.  It is fairly simple to figure pitch if that is all you need but I needed to have the peak of the roof with the strapping and metal fall under the edge of the existing house roof.  Since we have used metal for a number of projects on the homestead I had a scrap that I could measure depth and get an idea of how far down from the house roof edge I needed the ridge board to be.  From there I figured what I need for angle and where I needed the crows foot to be cut in order to have the 6 inch overhang.

It took me the best part of the afternoon to get the rafters in place.

Framing finished
Framing finished

After that the strapping to screw the metal to was put in place.  We were now ready to measure for the metal pieces.  We are fortunate to have a local lumberyard that cuts metal to specifications.  My husband Ken had stopped on one of his days off and picked up the ridge piece so I could us it for measurement purposes but now we needed the roof metal.  The order was placed and in a day picked up and ready for installation.  The pieces were only 55 inches long which makes them fairly easy to work with.  When we put the metal roof on the barn we were working with some pieces that we 10 feet long.  It can be a real challenge with long pieces if you have any wind at all.

So Ken and I installed the metal together.  Putting metal up is not a part of this project that you really want to do by yourself especially when you are high on a ladder.  In our case though we used the tractor bucket for a work platform.  It really works well.  Either Ken lifted me and I screwed down metal or I lifted Ken and he screwed down the ridge piece.  We make a pretty good team.

A couple of additional notes.   I used screws for the entire constructions.  Someday we might put a small addition on that side of the house and besides being much stronger than using nails it is also easier to take apart and reuse the materials.  I did add additional bracing on each rafter section to tie each side together and support the ridge beam.  We have left the bracing in place for the winter.  Next spring I will add railings to the porch which will give additional strength to the structure. However with that said our uncle who is a licensed Structural Engineer said it would hold the snow no problem.  It does look a bit rustic without soffits of a fascia but that suits our style.

Have a Blessed Thanksgiving

The Thanksgiving week has begun and that means cooking.  I love to cook and be creative in the kitchen.  Since my husband and I both work we take breakfast and lunch with us each day.   And since our chickens have been very generous in giving us many eggs each day I decided to cook up a bunch of Breakfast Burrito filling.  I started by making breakfast sausage a few days ago.  This allowed for the sausage to get happy and all the flavors to meld before cooking.

I used some of our home raised ground turkey as the base for the sausage.  I usually mix ground turkey and ground pork but the pork was not back from the butcher when I made the sausage.

Breakfast Sausage

Ingredients

  • 1 lb ground pork, turkey or a combination
  • 1 tsp. salt
  • 1/2 tsp. ground sage
  • 1/4 tsp. ground black pepper
  • 1/4 tsp. ground nutmeg
  • 1/4 tsp. dried thyme
  • 1 pinch ginger
  • 1 tbsp. water

Instructions

  1. Mix all ingredients and place in refrigerator overnight. You can cook it immediately but if given time to get happy for awhile it is much better. Cook as crumbles in a frying pan for recipes like the Breakfast Burritos or make into patties and serve with any meal. Feel free to double or triple the recipe. I find this disappears quickly at my house.

Cook up the sausage until done then add a dozen or so beaten eggs to the pan and cook until you have a nice sausage and egg scramble.

Sausage Egg Scramble

Now let's build the burritos.  I placed a length of plastic wrap on my assembly plate.  On top of that went the whole wheat tortilla followed by some of the scramble.  On top goes some salsa and a bit of cheese.  We always have salsa and cheese in the house.  Roll the tortilla up then wrap the whole thing in the plastic wrap.

The individually wrapped burritos goes into a zip lock bag ready for the freezer.

Now if I'm running late in the morning we can just grab a couple of these out of the freezer.  By the time we get to work and are ready for breakfast they will be thawed out.  Just unwrap the plastic and heat in the microwave.  Yummy, homemade breakfast.

I also tried a new recipe this week for Pumpkin Muffins which I found on Lovely Little Kitchen website.  I admit it I love almost anything with pumpkin in it.  In fact pumpkin pie is my favorite.  These muffins are made with coconut oil and turned out very moist.  I decided to go one step further than the recipe by making my own cream cheese filling for the muffins.  In my mixer I mixed 8 oz. softened cream cheese with a teaspoon of vanilla and 1/2 cup powdered sugar.  After the muffins cooled I put the filling in a pastry bag with a round tip on it.  I inserted the tip into the muffin and squeezed as I drew the tip out filling the muffin.  Not only do they look great they were delicious.

Pumpkin Muffins with Cream Cheese Filling

Between cooking and baking the turkeys went to the butcher.  They are now home cooling off so they can be packaged tomorrow and delivered in time for a delicious meal for several families in our area.

It is a lot of fun raising the animals but it is also a lot of work, this time of the year especially.  Soon the barn will seem empty with only the laying hens staying year around.  It will be so rewarding though on Thanksgiving day when we are eating our own home raised turkey.  It is so delicious.

I want to encourage everyone to take some time to think about all your blessings and be thankful for each of them.  Give friends and family a call this week and let them know how much you love and appreciate them.  The people in our lives are so much more than the things.

Many blessing to you and your family this Thanksgiving.


As I get ready to head outside on this beautiful November day here in Maine I'm making a smoothie for breakfast.  I have mentioned these is a previous post but I have never shown you what I do to make them.  So here is my method.

Kefir ready to use. The grains are floating at the top

I start with my home made kefir which has been fermenting on the counter for 12 hours.  I rotate between two pint jars.  Each jar has kefir grains in them.  Fortunately here in Maine I can purchase whole unpasteurized and not homogenized organic milk from a local dairy.

Since I am still working we do not have any dairy animals on the farm.  There is a huge time commitment to keeping them healthy and milked that I just don't have right now.  Our goal is eventually to have a very small dairy goat herd.  Our land is much more suited to goats than cows.

I put one of the pints of kefir out on the counter in the morning and leave it the entire day.  We have found that around 12 hours of fermenting creates the flavor of kefir that we like.  In the evening the kefir goes into the refrigerator so it will be cold when I add it to the smoothie in the morning.  The next morning I use the fermented pint for the smoothies and put the second one out on the counter for fermenting.  After I pour the kefir into the blender I add more milk to the kefir grains and put it into the refrigerator.

Kefir and yogurt with chia seeds

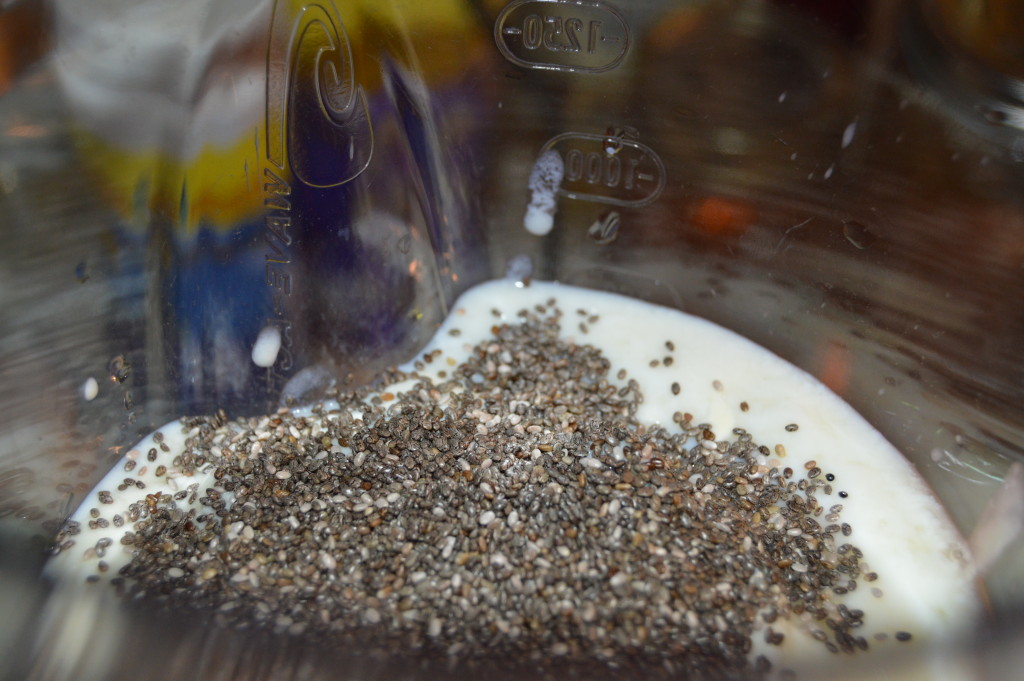
To the kefir I add a pint of plain homemade yogurt.  I then thrown in about a tablespoon of chia seeds.  Chia seed are all the rage I know but they really are good for you.  Chia seeds contain a high amount of omega-3 fatty acids and fiber both which are thought to help with diabetes, heart disease and high blood pressure.  Now who couldn't use a little help in that direction?  Besides if you don't drink your smoothie right away, I take mine to work with me, they get gelatinous and help to thicken the smoothie and I think it makes them easier to digest that way.

DSC_0005 (5)

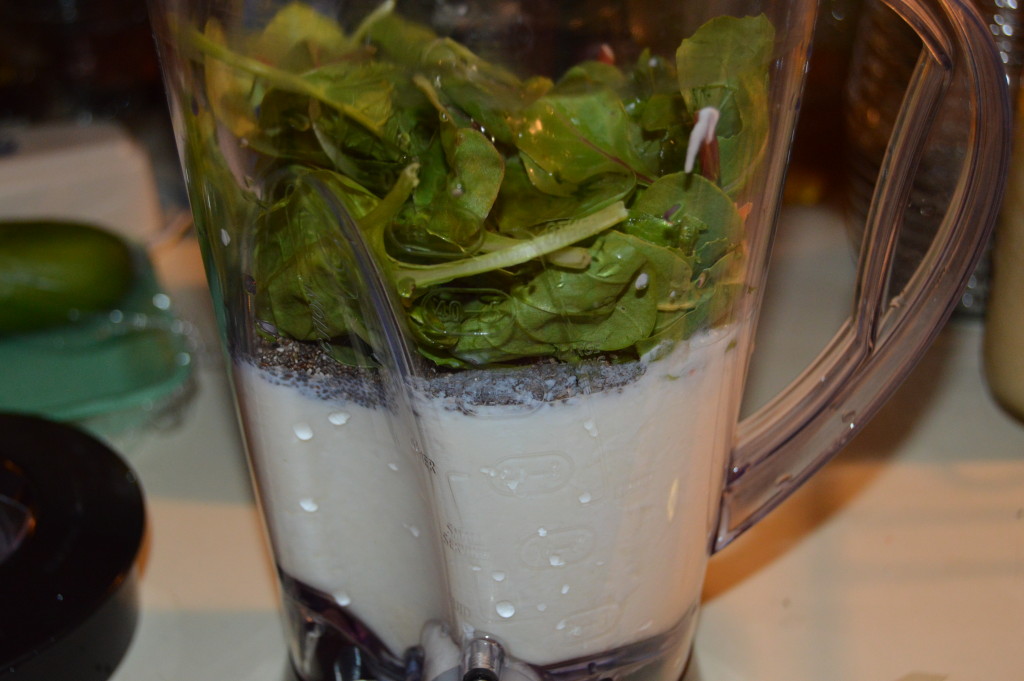
On top of the chia seeds I add greens.  I am able to get an organic mix of spinach, kale and chard.  A good handful is all that is needed.  Then about a tablespoon of our raw honey is put in.  I don't use it so much for the sweetness because the fruit makes it fairly sweet, but for the properties it has to fight allergies and strengthen the immune system.  Besides what can be better than using some of your own (actually my bees) honey everyday.

Then in goes the fruit.  I have used several combinations depending on what we might have in the house but there is usually a banana then some frozen strawberries and blueberries from the homestead.  I have also used kiwi which adds a nice tang to the smoothie.  Now that apple season is here I want to try a apple cinnamon smoothie which I think would be really yummy and cinnamon is really good for you too.

DSC_0003 (3)

Ok, now for the "smoothie" part.  Everything gets processed in the blender until smooth.  I use the blender on medium speed at first to get everything incorporated.  It takes a few seconds until the fruit make their way to the bottom of the blender to be chopped.   I leave the blender at this speed until it looks like the fruit and greens are all chopped fine.  I then turn the blender up to full blast for just a few seconds at the end.  You don't want to leave it on high for too long because it blends air into the smoothie.

DSC_0012 (5)

Put your smoothie in a sealed container and off you go with a nourishing smoothie to start your day.  Well, I'm off to hang the sheets on the clothes line.  This guarantees a good night sleep tonight on sheets fresh from the outdoors.